Clearing snow from a driveway, walkway, or front path can quickly become tiring, especially when shoveling strains your back, shoulders, and knees. For Mowrator S1 4WD owners, the Snow Plow Kit offers a practical winter setup: your mower becomes an RC snow plow that pushes snow by remote control. It is not a snow blower, and it is not meant for frozen snowbanks or deep, compacted piles. Used in the right conditions, it can make routine snow clearing much easier.

Why a Lawn Mower Plow Is a Smart Winter Investment
For Mowrator S1 4WD owners, the Snow Plow Kit turns a mowing-season machine into a winter snow-clearing tool. A lawn mower plow setup can reduce the need for a separate snow machine, especially for homeowners who only need to clear light to moderate snow from a driveway, walkway, or firm path.
The main value is less physical effort. You still control the machine, but you are not pushing a heavy shovel through snow. You can stand on a safer footing, keep the mower in view, and guide the blade with the remote.
This setup is useful, but it is not for every winter condition.
| Good Fit | Poor Fit |
| S1 4WD owners | S1 2WD owners |
| Light to moderate snow | Frozen snowbanks |
| Paved driveways and firm paths | Deep compacted buildup |
| Users who want less physical effort | Users who need to throw snow far away |
| Routine snow clearing | Heavy end-of-driveway plow piles |
If your property gets manageable snowfall and you already own the compatible mower, turning the S1 4WD into an RC snow plow is a practical way to get more year-round use from the same machine.
RC Snow Plow vs. Traditional Snow Blower: Which Is Better for Your Driveway?
A remote control snow blower and an RC snow plow solve different snow-clearing problems. A snow blower collects snow and throws it through a chute, which is useful when snow needs to be moved far away or lifted over a high pile. A plow pushes snow forward or to the side, which works better when you have room along the driveway or walkway to stack it.
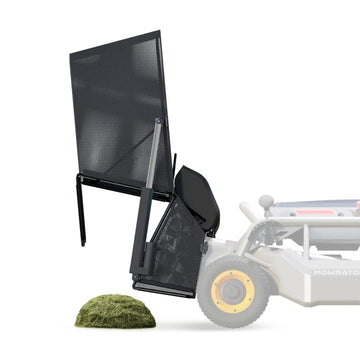
For routine clearing, the Mowrator setup works as a remote control snow plow. Its 31.5-inch blade can be set straight, left, or right, and the electric height adjustment helps the blade match the surface and snow conditions.
| Option | Best For | Limits |
| RC snow plow | Light to moderate snow on driveways, walkways, and firm paths | Needs space to push snow aside |
| Traditional snow blower | Deeper snow or areas where snow must be thrown far away | Requires more storage and more hands-on operation |
| Riding lawn mower snow plow | Larger open areas with room to push snow | The operator usually sits on the mower in cold, slippery conditions |
For S1 4WD owners, the choice is straightforward: use an RC snow plow for manageable snow that can be pushed aside. Choose a blower when the main problem is deep snow, frozen piles, or limited space for snow storage.
Pre-Winter Checklist: Preparing Your Mower for the Cold
Snow clearing goes better when the machine is ready before the first storm. Cold temperatures affect traction, battery performance, and moving parts. A few checks can prevent delays when snow is already on the ground.
Confirm Compatibility
The Snow Plow Kit is designed for the Mowrator S1 4WD. Do not assume it works with S1 2WD or other mower models. Snow pushing requires traction, weight balance, and accessory support, so compatibility should be confirmed before setup.
Update the Firmware
The plow setup requires the proper OTA update before use. This matters because blade control depends on the mower and accessory responding correctly. Check the mower software before winter so you are not trying to update it during a storm.
Prepare the Battery
Cold weather can reduce battery performance. Store and charge the battery indoors when possible, and avoid leaving it in freezing conditions for long periods. If the mower will sit unused for a long stretch, keep the battery properly charged according to storage guidance.
Install Snow Chains
Chains help the mower maintain grip while pushing snow. Fit them before the first use and check that they do not rub against nearby parts. When installing chains, the cutter deck height should be set to level 3 or lower to support proper clearance.
Check the Snow Conditions
The Snow Plow Kit is made for specific snow conditions. It can handle up to 30 cm of uncompacted powder snow, 5 to 8 cm of packed snow, and about 8 cm of slushy snow. Frozen snow is not recommended. The listed maximum driving snow depth is 10 cm, so users should clear in passes and avoid driving the mower into deep buildup.
Inspect the Clearing Area
Walk the driveway or path before the snow covers it. Remove hoses, toys, branches, stones, and loose edging. Mark curbs or low obstacles if needed. An RC snow plow can reduce physical work, but it still needs a clear path to operate safely.
Step-by-Step Guide: Installing the Mowrator S1 Snow Plow Attachment
Installation is easier when the parts are organized first. Park the mower on a flat, dry surface with enough room to move around the front of the machine. Read the full product manual before assembly, especially the safety and cable routing sections.
1. Lay Out the Parts
Place the snow frame assembly, U clamp, linear actuator, snow shovel assembly, fasteners, chains, cable plug, and snow shoes nearby. Check for missing or damaged parts before attaching anything to the mower.
2. Attach the U Clamp
Install the U clamp onto the snow frame assembly. Align the holes carefully and tighten the hardware evenly. A straight frame helps the blade sit level during use.
3. Install the Linear Actuator
Attach the linear actuator to the snow shovel assembly. This part controls blade lift, so it should be mounted securely and aligned correctly. Do not force the actuator into place.
4. Mount the Frame to the Mower
Connect the snow frame assembly to the front of the S1 4WD. Make sure the attachment points are seated correctly. Tighten the fasteners and check that the frame does not shift.
5. Install the Snow Shovel Assembly
Attach the shovel assembly to the frame and connect it to the actuator. Move the blade by hand only as directed in the manual. The blade has weight, so keep your hands and feet away from pinch points.
6. Fit the Snow Chains
Install the chains on the drive wheels and confirm that they sit evenly. Move the mower a short distance at low speed to check clearance. Stop immediately if the chains rub, twist, or come loose.
7. Connect the Cable Plug
Plug in the cable fully and route it away from wheels, chains, the blade edge, and actuator movement. A loose or poorly routed cable can create control problems or damage during operation.
8. Test Blade Height and Angle
Use the remote to raise and lower the blade. Set the blade straight for pushing snow forward, or angle it left or right to roll snow toward the edge of the driveway. Before clearing real snow, test forward motion, reverse, turning, blade lift, and stopping.
A careful test run helps confirm that the RC snow plow is ready before you add snow, ice, low visibility, and cold hands into the process.
Pro Tips for Clearing Snow With a Remote Control Snow Plow
Good snow clearing depends on timing, route planning, and staying within the machine’s limits. The goal is to move snow while it is loose and manageable, then avoid repeated passes over hard buildup.
Clear Snow Before It Gets Packed
Fresh snow is easier to push. If snow keeps falling for several hours, clear once during the storm and again after it ends. This reduces the chance of packed tire tracks and icy layers.
Work in Planned Passes
For a driveway, push from the center toward the edges. Angle the blade to move snow in the direction where you have room to pile it. On longer driveways, work in sections so the mower is not pushing too much snow at once.
Keep the Mower in Sight
Remote control operation still requires direct supervision. Stay close enough to see the blade, wheels, surface, and pile height. Do not operate the mower where you cannot see obstacles or people.
Adjust Blade Height for the Surface
Use a lower blade height on smooth pavement. Raise the blade slightly on uneven pavers, gravel edges, joints, or surfaces that may catch the blade. Snowshoes can help the blade ride above rough areas and reduce scraping.
Avoid Frozen Piles
A remote control snowplow should not be forced into frozen snow. Hard piles can reduce traction, stress the blade, and make the mower slide. Break up icy areas separately or use another tool for frozen buildup.
Leave Space for Later Snow
Do not stack the first pile too close to the driveway edge if more snow is expected. Push the snow far enough back to leave room for the next clearing session.
Clean the Attachment After Use
Brush off snow and slush from the blade, frame, actuator area, chains, and cable path. Check fasteners, pins, and chain fit before storing the mower. Small inspections help keep the RC snow plow ready for the next storm.
FAQs
Q1. Can the Mowrator S1 Work as an RC Snow Plow?
Yes. The Mowrator S1 4WD can work as an RC snow plow when fitted with the compatible Snow Plow Kit. It is designed for remote-controlled snow pushing on suitable surfaces and within the listed snow condition limits.
Q2. Is It a Remote Control Snow Blower?
No. It is a plow setup. A remote control snow blower collects snow and throws it through a chute. Mowrator S1 with the Snow Plow Kit pushes snow with a blade, so the remote control snow plow is the accurate term.
Q3. Can It Replace a Snow Blower?
It can replace a snow blower for some routine driveway clearing, especially with light to moderate loose snow. It should not be treated as a full replacement for deep, frozen, or heavily compacted snow.
Q4. How Deep Can the Snow Be?
The kit is listed for up to 30 cm of uncompacted powder snow, 5 to 8 cm of packed snow, and about 8 cm of slushy snow. The listed maximum driving snow depth is 10 cm, so deeper accumulation should be cleared in passes.
Q5. Do I Need Snow Chains?
Yes. Snow chains are an important part of the winter setup because they improve traction while the mower pushes snow. Install them correctly, check clearance, and inspect them after each use.